With the rise in so many people being diagnosed as “Gluten Intolerant” or having a “Gluten Sensitive” it’s no wonder that this naturally occurring protein has gotten an undeserved bad name. Unless the diagnosis is actually “Celiac’s Disease” – you may just be one of the numerous people who are affected by our highly processed flour and diet and may not actually suffer from a true intolerance or sensitivity to gluten. I truly believe, and can attest to it personally for myself, that it is not gluten that is the problem for most people. It is the processing of flour to make it so-called “shelf worthy” that is a big problem.
The truth is that gluten is present in many grains, mostly however, wheat is the most widely used and recognized. Gluten was not ever meant to be consumed without the benefits of the entire grain – which you cannot get in a bag of dead store bough flour…even ‘whole’ wheat flour. Mostly because it isn’t the whole wheat kernel…although it may be allowed to labeled that way.
 The wheat grain was created to work like all whole foods – with a synergistic relationship one part to another, with each part in tact. When a wheat grain is stripped down to make white flour all but the endosperm is discarded and we are left with the white flour that can hold together a paper mache’ creations – of course then gluten becomes an issue – where are the parts that help us to digest this ‘glue’? They are missing. Even in ‘whole wheat’ flour the wheat germ oil mostly is removed to prolong shelf life. Traces of it are left and the rancidity of the traces of oil is what cause the bitter taste in bagged ‘whole wheat’ flour. No wonder no one seems to think they can like whole wheat – they taste the rancid oil left in the bagged dead flour.
So there are two problems – just to name a a few that help to feed (no pun intended) this frenzy of gluten being a problem. It in fact is a fraction of a whole that was meant to work together in our digestive system.
Now let us just take a quick look at what is missing nutritionally when we consume only the white dead bagged flour.
It’s called ‘enriched’ flour for a reason. It has been ‘enriched’ with synthetic (yes, think – fake) vitamins and minerals to attempt to replace what has been removed when the other parts of the kernel have been omitted from your flour. 
This small diagram to the right (if you click it – it enlarges) shows what is missing when only the white flour is consumed. The lack of vital nutrients in the wheat flour that we consume is creating gluten sensitivities and intolerance – not the gluten itself. Gluten itself may not be the problem.
The bran contains more protein than the endosperm, trace oils (good oils too – natural vitamin E ) a very high percentage of one’s daily allowance of fiber and iron. Not to mention the B vitamins vital for energy in our bodies.
The germ is the powerhouse for the kernel that helps it grown into a live plant – and our commercialized process strips it from us. Highest in protein, it also contains the vital oils with their vitamin E and lipids and omega oils that we seem content to pay extra for in supplements. Iron and B vitamins are also very high in the wheat germ.
We are a people who are satiated, yet extremely malnourished.
Below are some personal stories about my journey to discover the real problem for me and I suspect for many who may be under the assumption they have a gluten problem. Please listen and watch to gain more information than is not included in this post.
You can listen to my story below and see the path that I personally took to prove that gluten was not the problem for me:
New Family Internet Radio with Millers Grain House on BlogTalkRadio
This video was one of my first on our YouTube Channel.
80+ videos later it still is one of my favorites for educating people about the benefits of home-milling.
I hope you enjoy…
Oat groats are such extremely versatile little grains!
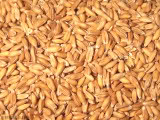
They can be milled by a grain mill (when still a whole grain) in to oat flour. Although not ideal for making use of in yeast breads as the single flour, the flour can be included as part of the required flour, yet oat flour can be utilized practically entirely as a substitute in various other baked goods not requiring yeast.
Oat Groats can likewise be utilized as Steel Cut Cereal (see picture at the right) and prepared as a thicker, chewier variation of oatmeal, included in a selection of warm dishes and baked/cooked goods.
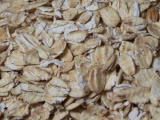
They can be rolled with a flaker turned into the old made rolled oats that the majority of individuals know them by. (pictured to the left)
Once rolled, they can then be chopped into finer pieces using the food processor utilizing the S-blade and turned into healthy Quick Oats! See this video – http://www.youtube.com/thewheatguy#p/u/31/CR6En56LNUU
From one extremely versatile grain, you could make so very many different food staples. Such a great space saver for long term food storage space and a healthy and balanced option to fast fix foods with that contain harmful additives.
For more tips to how much variety this one grain (oats) can give you – you may enjoy this short radio show “Getting Grain Specific: Sewing some (wild) oats” – Just fast forward to about minute 10:00 because there were terrible technical difficulties… but there is still some good info! (: *embarrassed smile*
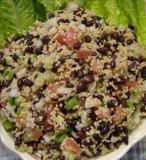
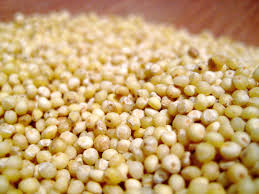 This Gluten Free: Easy Millet & Veggie Salad is a great summer treat.
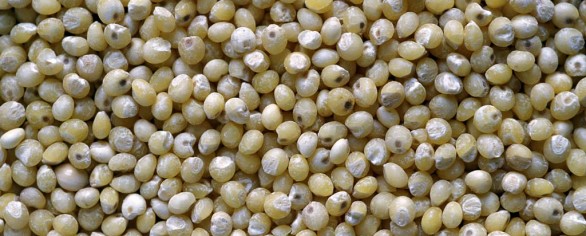
Commonly used in gluten free diets, I’ve found this grain is even more versatile when used whole rather than milled into flour. I like the simplicity of it and the texture. It rivals the texture of couscous (which is not a grain at all but a small durum wheat pasta) holding it’s form and shape well even after over cooking. It is an excellent option to replace rice and other whole grain side dishes.
For those warm summer nights and easy summer lunches, this recipe is both filling and cool to keep the kitchen from becoming a hot spot.
First be sure you are using food grade millet. Be sure it is fit for human consumption and not bird seed.
To cook basic, plain millet:
Rinse and drain 1 cup of millet. Set aside. In a medium saucepan, bring 2 1/2 cups water and the 1 cup millet to a boil. Cover, reduce heat to medium-low, and cook 15 minutes, much like rice until liquid absorbs. Remove from heat and let sit covered with a towel for 3-5 more minutes. This will be approximately 2.5 Cups in volume when done.
Once the millet is cooked and cooled, the opportunities for use are almost endless…
This easy recipe is my very favorite millet recipes used as a side, as a quick lunch or rolled in Nori as veggie sushi:
Millet and Veggie Salad
Ingredients:
1.5 Cups Cooked Organic Millet
1/4 Cup Cubed Cucumbers
1/4 Cup Diced Onions (red, scallions or white)
1/4 Cup Frozen Peas/Carrots
3 TBS Low fat Italian Dressing
Optional:
1/4 Cup cooked Organic Black Beans (pictured above – making this a complete meal with protein)
1/2 an Avocado Cubed*
1/4 Cup Cubed Tomato**
Mix all together in a large bowl or a container that can be covered and refrigerated for several hours. Overnight is best.
Serve chilled.
Lasts for almost a week in the fridge.
*Avocados added separately before serving, due to oxidation.
**Add Tomato separately upon serving due to easily spoiled.
You know, I wish everyone who read this blog post lived closer. Mostly because my most favorite thing about my ‘work’ is teaching. I really am not a fan of inanimate objects, retail sales or general accumulation of stuff…but I am a fan of acquiring skills and then sharing them with others. If I could make a living off of just sharing what I’ve learned through trial and error…I most certainly would!
So why am I blogging about a class that you may or may not be close enough to come take…well… because we hope to create this class as a downloadable video or a DVD. Well, and yes, if you are close enough to the neighborhood – I’d love to meet you and share this experience with you (provided your interested of course).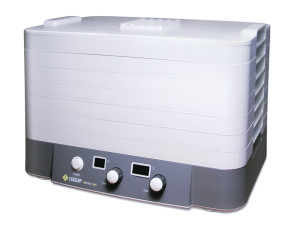
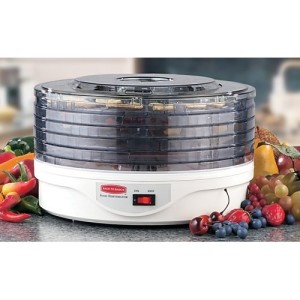

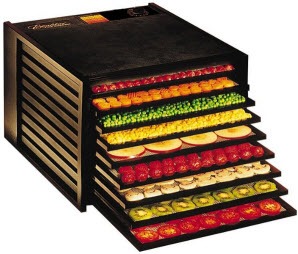 Dehydrating is one of the best ways to prolong the harvest and halt the spoiling of fresh produce (thus saving money). As a matter of fact today – just before posting this – we were dehydrating some mushrooms in the All American Sun Oven just outside the shop door. Why? Because they were on sale because they were too close to the ‘buy by’ date and we know we can make them long-term shelf worthy this way BEFORE they spoil!
Dehydrating requires no electricity for storage so when the power goes out, you still have shelf stable food available without all the added preservatives.
So if you are able…I hope you’ll consider attending this (or any other class)!
The Dehydrating Basics Class will give you the basics of getting started. We’ll share some ideas of what dehydrates well, what doesn’t and even some surprises with things you thought maybe couldn’t BE dehydrated but can be!
Here’s what we’ll do….
Eat some samples and give you some recipes. (:
Learn Proper Storage instructions for your dehydrated foods.
Learn some Re-hydration tips.
Demo and try a couple of Non-Electric options to dehydrating.
If you own a dehydrator already – this is a chance to learn to take full advantage of this money saving tool! I hope you’ll attend if you can, or if not, perhaps we can send you the DVD later on!
Although often asked about my heritage – I do not have any Hispanic blood in my ancestry. Odd thing is, based on our favorite foods – you might think so. (:
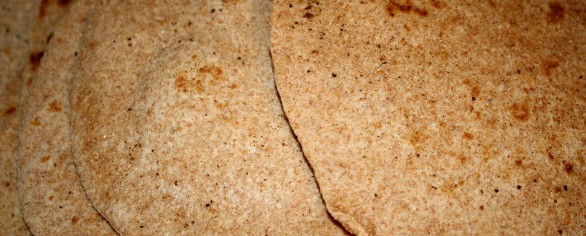
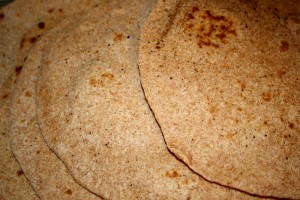
So it is with this thought in mind I share one of my favorite versatile South of the Border foods. The tortilla! Of course I’m going to make it whole grain and with healthy oils so we can enjoy them more often. I’ve also included with this recipe is a video I made to make it easier to follow along…and a bonus idea at the very bottom to make this an even more versatile recipe. I hope you enjoy!
FRESH MILLED WHOLE WHEAT FLOUR TORTILLAS
Makes 8-12 servings
Dry Grains you need to mill:
1.5 Cups Hard Wheat (Red or White)
You may wish to use 3/4 hard and 3/4 soft wheat
‘Special’ Items Needed:
- Griddle, Large Sauce Pan or Electric Tortilla press
- Rolling pin (unless you have a Tortilla press)
- Plastic Wrap
List of Ingredients:
- 1 Cup Warm Water (you may not use it all)
- 1/4 Cup Olive Oil
- 1 tsp Salt
- 1/4 tsp Baking Powder
- 2.5 Cups Freshly Milled Flour
Using fork or wire whisk, combine all dry ingredients in a medium bowl. Then drizzle the oil over top whisking in to mix to make small crumbles.
Now, with a spoon/spatula, slowly mix in warm water by drizzling in from down the side of the bowl while mixing. Combine enough water until mixture is moister than a yeast bread but drier than a muffin mix. When it pulls from the side of the bowl while mixing it should be ready. Turn the slightly tacky/sticky dough out on to plastic wrap and seal. Place in fridge for 10 -30 minutes.
Remove the dough and divide it into even size dough balls. Slightly flatten to hockey puck shape. Starting from the fist one you shaped/handled….work your way through them in this order (odd yes, but the extra ‘sit’ time helps them form).
Use Tortilla press if you have it per manufacturer instructions.
If you don’t have a press, then roll out each tortilla while griddle or sauce pan are pre-heating to med-low heat. When we roll these out we call them “American State Tortillas” – because some look like SC, or VA some are the shape of CA… but they all taste and wrap great anyway!
As each one is thin to your liking, flip onto a lightly greased griddle or sauce pan for a minute to two per side. You can get pretty good at this as you flip one roll another, remove and replace. You’ll have 8-12 of these done in no time.
Store in the refrigerator with a half of a paper towel between each in a zip lock bag for up to two weeks.
Bonus Recipe Idea:
Add a couple TBS of Organic Cane Juice Crystals and a dash or two of cinnamon to the dry mix. Sweet Tortillas to roll up fruits and cream cheese for a quick dessert or breakfast.
For more recipes, encouragement and tips – please Join Our Newsletter – we would love to keep in touch!
Best Blessings!
Donna Miller
Take a little trip with me, if you will, down memory lane…
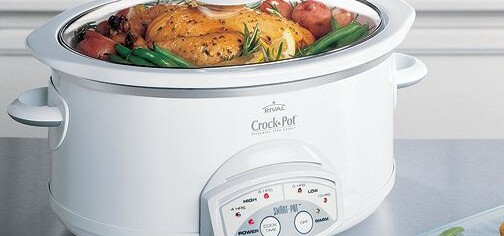
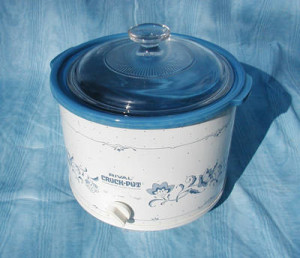
The first crock pot that I ever owned looked quite similar to the one pictured here that I saw for sale on eBay. I really don’t know the year, make or model but I do know the sentimental attachment to it. It had two settings – high and low. No automatic turn off time, no warming option if we came home later, no removable crock (this puppy was all one piece) and only one compartment for food.
The one thing it did do was a realistic LOW setting.
There were several models like this that seemed to be like our right hand in the kitchen when the kids were little, work was late and family was busy that helped many of us put a hot home-made meal on the table!
Then, enter the idea that we could improve on the one chamber simpleton that we reminisce about with fondness and we opted for one with more variations….like this one pictured here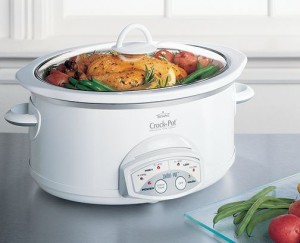 . The singular interior crock came out making it much easier to wash and could be replaced with an equally easy to clean dual chamber ceramic crock, thus allowing two different items to be slow cooked at the same time. Also there were multiple time and temp settings with a warming time if we perhaps were a bit delayed getting home to avoid over cooking.
This seemed to be a great improvement on the one-pot wonder from years gone by. I did move to making many a meal in the larger crock pot both for the ease of wash up and the need for larger meals – the kids were in fact growing, as kids will do. But one flaw I never quite overcame puzzled me until just recently. Even when set on low, this crock pot got too hot!
All the kids are grown and gone now – but I finally figured out how to make a too-hot low heat work better. Now please note, this will not work if your crock pot turns off with the break in electrical current (such as the one above does)…but if you have one that is too hot but stays on a simple setting, you can fix it this way.
Plug it in to a lamp timer.
Chances are you have something like this or you can find them at thrift stores and garage sales for pennies. Simply set it to go on an hour and off the next all the way around the timer. Plug in the crock pot (one that stays on even if the current breaks) and set it on low.
This will work well if you are hoping to warm soup that has pasta or rice (which can become obliterated in too high of heat) or you simply want to make sure you don’t scorch the sides of a smaller serving while keeping it on the lowest possible simmer all day.
I found this to work well for heating food that had already been cooked and keeping things hot enough to avoid spoilage without over cooking them.
Here’s a confession: I still have and frequently use my old, one pot wonder…it still works fine!
Best Blessings!
Donna Miller
Millers Grain House – Bulk Route
Millers Grain House – FAQ’s, Blog, Radio & MoreThank you for allowing us to serve you. It is our pleasure!
Deut 28:5 – “A blessing upon your grain-basket and kneading-bowl.”
Feel free to contact our office via email or call during business hours.
Mon – Thurs 9:00-5:00, Fri 9:00-4:00 Eastern Time (Closed Sat & Sun)
828.536.4988
Parmesan-Herb Bread
2lb Loaf Recipe
Ingredients:
- 1 ¼ Cup Warm Water (100-110 degrees)
- 1 Tablespoon Oil (Olive, Canola, Safflower or Sunflower)
- ¼ Cup Sweet Stuff (Sugar, Honey or Sucanant)
- 1 Medium Egg
- 3 ½ Cups of Flour (this can be any combination of Whole Wheat and White Bread Flour – best for newbies to start out with 1 ½ Cups White & 2 Cups Whole Wheat)
- 1/4 C Grated Parmesan Cheese
- 1 TBS Oregano
- 1 tsp Onion Salt
- 1 tsp Garlic Salt
- ¼ Cup Gluten
- 1 ½ teaspoon Fleishmann’s Instant Yeast
- Another Egg & 1 TBS cold Water for Egg Wash
- Another 1/4 C Grated Parmesan Cheese
For Bread Machine: Put ingredients in in order given and set to
‘Dough Setting’ – now go fold clothes, vacuum and clean the shower
(o:
By Hand or with Mixer/Dough Hook : Mix all the water, oil, egg and sweet stuff together in your mixing bowl. Proof your yeast in the whole liquid if you want to. Instant yeast does not HAVE to be proofed (let get bubbly) but it won’t hurt it if you do. In a separate
bowl, mix all your dry ingredients (flours, gluten, salt and yeast
if you didn’t proof it).
Slowly add each of the dry ingredients to the liquid stirring until too hard to use a spoon, then start the hand kneading process (or if in the kitchen aid – start the dough hooks, or if in the Bosch Mixer…follow directions for kneading).
Knead (by hand, by hook or by Bosch ) minimum 10 minutes – up to 15 minutes – until dough feels elastic and looks silky-like (or in
Bosch Mixer – it pulls away from the sides).
Cover bowl with a clean cloth towel.
Let dough rise once in the bowl in semi warm place approximately 30 minutes or until double the size it started.
LIGHTLY punch it down to get all the air out after it rose the
first time.
(All above steps are usually done on ‘Dough Setting’ of your bread machine)
Turn out onto AN OILED (not floured – it makes it heavy and dense)
surface to REST for 5 minutes (this helps the gluten that has
formed to relax a bit and not ‘crack’ the crust).
Now form your loaf by flattening by hand, and rolling up like a
‘jelly roll’ and after tucking ends in and seam side down, place it
into a greased loaf pan.
Beat the 1TBS cold water in with one egg in a small bowl and brush the top of the loaf. Sprinkle with a light dusting of Parmesan Cheese.
Cover the pan with a clean towel and let rise in a semi-warm place
another 30 minutes.
Last 10 minutes of rising, preheat oven to 350 degrees (be sure
your racks are placed so that loaves bake in the middle of the
oven).
Bake 18-22 minutes in center of the oven. Start checking for
golden tops and ‘hollow’ sound when top is tapped at about 18
minutes.
Take out of pans and cool on a wire rack.
Wait at least 10 minutes before attempting to cut – or it smooshes!
If you can wait that long after smelling it bake! Use a serrated
knife for best results in cutting.
Use a good olive oil and balsamic vinegar for dipping!
Other shapes/uses:
This same recipe can be many smaller shapes. Simply shape differently and bake approximately 15 minutes on 350.
Cloverleaf Rolls – about 12 – divide into 12 equal weight balls of dough. Then separate each each ball into three equal balls. Place all three in the base of a greased muffin tin. Fill each muffin tin with the 3 small dough balls made from the 12 larger dough balls. Brush with egg wash and top with the Parmesan Cheese. They will rise and and fill the muffin tin cup in about 30 minutes. Bake 15 minutes on 350. Cool on wire rack and store in airtight bag.
Herb Sticks – about 12 – divide into 12 equal weight balls of dough. Roll like a thick play-doh snake and place on a baking sheet not touching. Brush with egg wash and top with the Parmesan Cheese. They will rise and touch in about 30 minutes. Bake 15 minutes on 350. Cool on wire rack and store in airtight bag.
Dinner Rolls – about 24 – divide into 24 equal weight balls of dough. Make a ‘domino’ sized oblong dough ball with creases on the bottom and place in a casserole dish not quite touching. Brush with egg wash and top with the Parmesan Cheese. They will rise and touch in about 30 minutes. Bake 15 minutes on 350. Cool on wire rack and store in airtight bag. These will pull apart easily.
For step by step pictures and instructions of my FAVORITE way to shape and serve this recipe (Rosettes pictured below) be sure to see the instructions below.
 |
Shaping the Rossettes
Divide dough into 6-8 equal weighted balls of dough. Then take one and form a ‘snake’ about 1 to 1.5 inches in diameter.
|
 |
Then tie a ‘knot’ in the center of the ‘snake. It should look something like this.
|
 |
Then bring the longer end over the top of the dough knot tucking it into the center hole of the knot.
|
 |
Then bring tuck the remaining shorter end (see above) under the knot and pinch slightly into other dough to hold. This one has been transferred to the cookie sheet already.
|
 |
The finished product dusted with Parmesan and ready to eat!
|
By now, you’ve likely heard the drastic affects that will take place on our food costs shortly after 2013 begins. Don’t let the pending price hike catch you off guard.
If you are in our area – check to see if you’re on the delivery route. If you’re not, we do ship orders out of our area (usually under 70lbs) with a shipping carrier of your choosing (USPS or UPS).
Stock up now by buying bulk foods before the squeeze is put on your pantry budget for the new year.
Delivery Route Dates:
Orders Shipped Out of Delivery Area:
Best Blessings!
Joseph & Donna Miller, Owners
Millers Grain House Bulk Delivery Route Site
Thank you for allowing us to serve you. It is our pleasure!
Deut 28:5 – “A blessing upon your grain-basket and kneading-bowl.”
Feel free to contact our office via email or call during business hours.
Mon – Thurs 9:00-5:00, Fri 9:00-4:00 Eastern Time (Closed Sat & Sun)
828.536.4988
Come Visit the NEW Millers Grain House –https://www.millersgrainhouse.com
Video Encouragement – http://www.youtube.com/MillersGrainHouse
Encouragement in the Kitchen – http://www.blogtalkradio.com/millersgrainhouse
You know that phrase made famous by the Vikings in the Capital One commercial? “What’s in Your Wallet?” – Well, let me ask: “What’s in YOUR Fridge?”
On any given day that may be a scary question for some – but for most of us after  Thanksgiving, it’s not only scary, it’s a downright daunting and overwhelming question!
The answer is a resounding LEFT OVERS!
When faced with a myriad of foods that you don’t normally eat during the year, left in odd amounts hiding or sliding around after Thanksgiving, some of us may be tempted to toss the left over food, given the turkey coma we have just induced. But do not despair… There are many things you can do with left over Thanksgiving goodies so you won’t waste your food budget by feeding it all to the dog.
Mashed Potatoes:
Portion them out into one cup servings, into baggies and freeze. When you need to thicken a soup, top a pot pie or simply have a quick side dish (seasoned with cheese, chives, garlic, etc) – these are quickly thawed and used.
Sweet Potato Casserole:
Portion this out into one half cup servings, into baggies and freeze. These make great additions for muffins and can be added in to winter squash soups. Again they are a stand alone side dish at a far later date.
Green Bean Casserole:
Given that this is usually laden with mushroom soup and fried onions – it usually doesn’t keep well for too long. Plan on tossing this into your turkey pot pie as an added green veggie and cream soup base. The onions will soften and blend with the other ingredients…no one will know that you used it there.
Cranberry Relish/Jelly:
Also another great add-in for muffins. It turns your muffins a sweet pink and you don’t have to add as much sugar as the usual recipe.
Turkey:
I’m not sure why we always have way more turkey than I think we will. After days of turkey sandwiches – it’s still HERE! So here are some thoughts…
Break the bones with the meat on them, boil and make broth that can be frozen or canned.
Then de-bone all the meat you can glean (we ended up with a gallon bag of bits) and make any number of things such as turkey and rice soup, turkey pot pie, turkey salad for wraps or sandwiches, turkey tacos (use taco seasonings), turkey barbeque on a whole wheat bun. Yes, all of these are on the menu for the next few weeks at our home. Simply label and freeze portion sizes to make the specific meal.
Once you’ve tended to the left overs and they are in their proper place (not hiding in the fridge or trashed) you can move on to some more ‘normal’ meals and enjoy the fact that you can give Thanks for having this other food on hand!
 Donna Miller is a teacher, author, sought-after speaker and trainer. She has been a both guest and host on internet and broadcast radio talk-shows and in television interviews. She enjoys teaching online and local classes & ladies retreats for people to learn whole food cooking, budget friendly techniques and preparedness skills. Donna is happily married and has three adult children, and a daughter in-law. She and her husband (Joseph) are the founders of both Millers Grain House , Your Preparation Station and are on the board of PREPARE Magazine.
On a windy, wet and snowy day – one of my favorite things to do is season my cast iron ware. This ‘chore’ takes on a warm-the-house feeling when I choose to do it in the winter. So it’s not at all a drudgery for me.
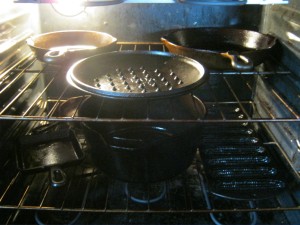 What is ‘seasoning’ you may ask? It’s simply the act of creating an oil coating on the porous cast iron so that the foods cooked in it don’t stick. People use many different oils (solid fats and liquids) to season their cast iron.
We have a favorite two oils we use: Grape seed Oil or Coconut Oil. We use these because of their higher smoke point.
How we season our cast iron:
- Be sure the cast iron item is clean by scrubbing with very hot water and a wire brush, plastic brush or steel wool – no soap – EVER because the pan will soak up the suds and ruin. Water is alone all that is needed.
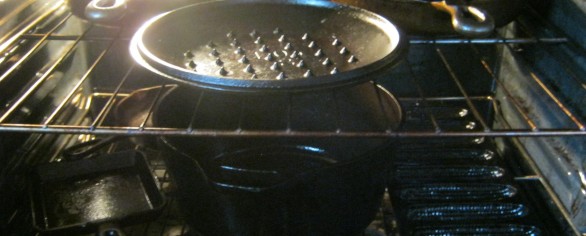
- Situate the racks in the oven to fit all sizes of the cast iron. Preheat the oven to 35O degrees.
- Generously pour the oil or grab a ‘glob’ of solidified oil and spread all along the interior, exterior and handle of the cast iron ware. Now some folks like to use a paper towel or a brush to do this…not me, I like to use my hands. This way I can feel if there are any bits of food left or flaws that need extra oil (to avoid rust). Plus, it moisturizes my hands.
- Be sure there are no puddles of oil, but that it is smoothly and evenly distributed.
- Place all the cast iron in on the racks and turn it off. Some folks say to put it in upside down, we don’t do that because I don’t want any oils dripping directly on the heated coils of the oven.
- After the oven and the cast iron wares have cooled, rub one more time to be sure to distribute any oils. Store in cabinet and you’re ready for use at any time!
Using cast iron is one of the most healthy ways to have a non-stick surface, add trace amounts of iron into your diet and, create an heirloom piece of kitchen ware that will out last you – that can be handed down to the grand-kid’s grand-kids.
________________________________________________
 Donna Miller is a teacher, author, sought-after speaker and trainer. She has been a both guest and host on internet and broadcast radio talk-shows and in television interviews.
She is the hostess of “Your Preparation Station” on Preparedness Radio Network. She and her husband are the Organizers of WNC Preparedness Group in Asheville, NC. She is an Adjunct Instructor for Frontier Christian University. She teaches local classes & ladies retreats for people to learn hands skills.
She and her husband are the founders of Millers Grain House and, Your Preparation Station and are on the board of PREPARE Magazine.
Joseph and Donna have been happily married for 27 years and have three adult children, and one daughter in-law.
________________________________________________


