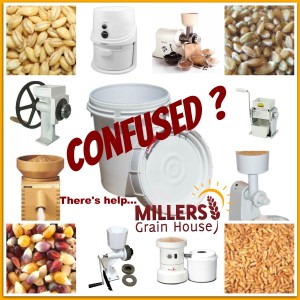
 I am often asked the questions: “What’s the best mill for me?” and “How do I store grains?” These are great questions and the answers differ depending upon your needs and your storage space. I have a two free things to share with you to help you answer those questions.
First – as much as I wish I could come to every town, visit each home and spend time teaching all over the place – until time travel or teleportation is invented – there are only so many hours in a day and miles one can make to do what I’d love. So, in light of that – I’d like to invite you to sign up by clicking here for ->THESE FREE ONLINE SEMINARS.<- You may or may not be interested in all of the ones offered – but I hope you’ll come to the ones that do interest you and – especially the one I’m hosting on July 17th (Thursday at 9PM Eastern)on the topic of Home-milling & Grain/Dry Goods Bulk Storage.
Here’s what you’ll learn:
- Why store whole grains vs. flours or meal?
- Why would I mill now…doesn’t it take a long time?
- What’s the best mill for my needs?
- Three top rules for grain & dry goods storage.
- Mylar, Gamma, CO2 Packs, oh my! Let’s make it easier.
It’ll be FUN! Like we’re in a class together. I’ll be there LIVE and able to take your questions at the end and help you personally. But you’ll need to -> sign up for the whole thing early enough <- so you can get in on that date.
Second – in order to help you with more detailed information to answer the questions: “What’s the best mill & how do I store grains?” I’d like to offer you this FREE Grain Mill Comparison Chart. If you’re a detailed person when it comes to making decisions and gathering information, this chart has it all in spades! Compare speeds, sound, quality and more with a quick glance across the lines. The grain mills on the chart range from manual to electric and ones that can be both! So no matter which ones may interest you – you can make comparisons!
Don’t forget that we are always available to help you by email and phone too! So feel free to contact our office via email or call 828.536.4988 during business hours. Mon – Thurs 9:00-5:00, Fri 9:00-4:00 Eastern Time (Closed Sat & Sun)
We would be honored to help in any way possible. Plus, we may have some savings for you too when you contact us!
A Compost Starter is such a useful tool for your garden, which leads to healthier eating and a better managed grocery budget. How much better would it be if you could get a compost Starter for FREE? Well, that’s what we hope to offer one person with this Giveaway!
Would you, or someone you know, love to win an Green Cycler – Kitchen Compost Starter, Bin & Shredder, Black?
This is your chance because we’re giving one away!


This Giveaway runs from June 23, 2014 12:00AM EST to June 29, 2014 11:59PM EST. Must be 18 years or older to be eligible.
No purchase necessary. The winner will be randomly selected.
Our Friends at “The Dollar Stretcher” have reviewed this item and are happy to share their findings with everyone.
Read more about it HERE
 David Letterman may be retiring, but I’ve got my own “Top 10” to share with you. It’s a little more useful than it is funny, but I hope you enjoy it. To get the full effect, hear the little nuances, tips and tricks plus enjoy the tongue-in-cheek approach I tried in order to make frugality a bit more entertaining, you’ll want to click the audio bar under that radio pictured to the left and listen to a recent show of mine (Surviving On Shoestrings on the Survival Mom Radio Network).
To follow along and get a hint of what I break down in the show, here is a basic list of my “Top 10 Frugal Tips & Thrifty Kitchen Habits“:
- #10 – Get Organized.
- #9 – Do a Weekly Purge.
- #8 – Grow Something (Garden)
- #7 – Cook from Scratch.
- #6 – Make your Own Condiments and….
- #5 – Portion Control from the Beginning
- #4 – Pack Snacks & Lunches…
- #3 – Shop Sales & Use Coupons Wisely…
- #2 – Plan a Weekly Menu…based on….
- #1 – Buy Extra & Buy Bulk!
Now if you listened all the way through, you know that the list is only the framework, the tips and ideas and ways of looking at our kitchen habits differently are what can help encourage you
Bonus contest!
Leave a comment and answer: How many times did I say the odd phrase: …. “Not to mention….” ?
The first one to get it right…I’ll send you a copy of my first e-book: Supreme Bread Machine Cookbook
Who knew that I said that many times…? It got kind of annoying…now that’s a new habit that I need to break!
Best Blessings and enJOY the Journey!
~ Donna Miller
Okay, I say the description of ‘great’ …and then I feel like an egomaniac since they’re my books…but I have had a lot of folks say they really like them so I’m just going off of their feedback when I say ‘great’. Please don’t think I’m tooting my own horn :/
I enjoyed writing them, testing the recipes and making sure I could convey exactly what I would if you were right here in 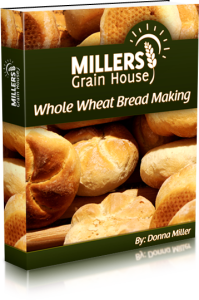 the kitchen with me. So, it is my hope that they are something you will enjoy too.
The two e-books are my “Supreme Bread Making with Bagel 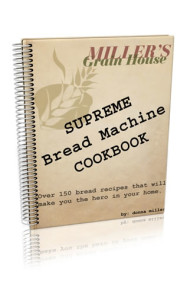 Video” and my newest “Whole Wheat Bread Making“. By clicking those links you’ll see what is in each e-book.
BUT… this post is more than showing you these to e-books…I want to give them to you if you win!
You can enter this Giveaway to have a chance to win BOTH!
Take a look at how it’s set up. You don’t HAVE TO do them all…but the more you do, the more points you rack up toward extra entries in the Giveaway! So…it’s up to you how many points toward wining you will want.
The Giveaway contest ends this Friday!
With the rise in so many people being diagnosed as “Gluten Intolerant” or having a “Gluten Sensitive” it’s no wonder that this naturally occurring protein has gotten an undeserved bad name. Unless the diagnosis is actually “Celiac’s Disease” – you may just be one of the numerous people who are affected by our highly processed flour and diet and may not actually suffer from a true intolerance or sensitivity to gluten. I truly believe, and can attest to it personally for myself, that it is not gluten that is the problem for most people. It is the processing of flour to make it so-called “shelf worthy” that is a big problem.
The truth is that gluten is present in many grains, mostly however, wheat is the most widely used and recognized. Gluten was not ever meant to be consumed without the benefits of the entire grain – which you cannot get in a bag of dead store bough flour…even ‘whole’ wheat flour. Mostly because it isn’t the whole wheat kernel…although it may be allowed to labeled that way.
 The wheat grain was created to work like all whole foods – with a synergistic relationship one part to another, with each part in tact. When a wheat grain is stripped down to make white flour all but the endosperm is discarded and we are left with the white flour that can hold together a paper mache’ creations – of course then gluten becomes an issue – where are the parts that help us to digest this ‘glue’? They are missing. Even in ‘whole wheat’ flour the wheat germ oil mostly is removed to prolong shelf life. Traces of it are left and the rancidity of the traces of oil is what cause the bitter taste in bagged ‘whole wheat’ flour. No wonder no one seems to think they can like whole wheat – they taste the rancid oil left in the bagged dead flour.
So there are two problems – just to name a a few that help to feed (no pun intended) this frenzy of gluten being a problem. It in fact is a fraction of a whole that was meant to work together in our digestive system.
Now let us just take a quick look at what is missing nutritionally when we consume only the white dead bagged flour.
It’s called ‘enriched’ flour for a reason. It has been ‘enriched’ with synthetic (yes, think – fake) vitamins and minerals to attempt to replace what has been removed when the other parts of the kernel have been omitted from your flour. 
This small diagram to the right (if you click it – it enlarges) shows what is missing when only the white flour is consumed. The lack of vital nutrients in the wheat flour that we consume is creating gluten sensitivities and intolerance – not the gluten itself. Gluten itself may not be the problem.
The bran contains more protein than the endosperm, trace oils (good oils too – natural vitamin E ) a very high percentage of one’s daily allowance of fiber and iron. Not to mention the B vitamins vital for energy in our bodies.
The germ is the powerhouse for the kernel that helps it grown into a live plant – and our commercialized process strips it from us. Highest in protein, it also contains the vital oils with their vitamin E and lipids and omega oils that we seem content to pay extra for in supplements. Iron and B vitamins are also very high in the wheat germ.
We are a people who are satiated, yet extremely malnourished.
Below are some personal stories about my journey to discover the real problem for me and I suspect for many who may be under the assumption they have a gluten problem. Please listen and watch to gain more information than is not included in this post.
You can listen to my story below and see the path that I personally took to prove that gluten was not the problem for me:
New Family Internet Radio with Millers Grain House on BlogTalkRadio
This video was one of my first on our YouTube Channel.
80+ videos later it still is one of my favorites for educating people about the benefits of home-milling.
I hope you enjoy…
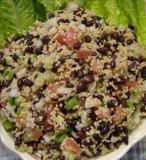
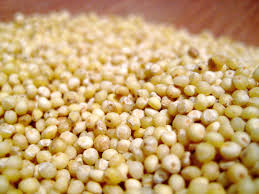 This Gluten Free: Easy Millet & Veggie Salad is a great summer treat.
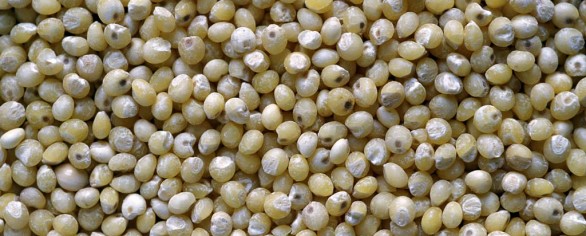
Commonly used in gluten free diets, I’ve found this grain is even more versatile when used whole rather than milled into flour. I like the simplicity of it and the texture. It rivals the texture of couscous (which is not a grain at all but a small durum wheat pasta) holding it’s form and shape well even after over cooking. It is an excellent option to replace rice and other whole grain side dishes.
For those warm summer nights and easy summer lunches, this recipe is both filling and cool to keep the kitchen from becoming a hot spot.
First be sure you are using food grade millet. Be sure it is fit for human consumption and not bird seed.
To cook basic, plain millet:
Rinse and drain 1 cup of millet. Set aside. In a medium saucepan, bring 2 1/2 cups water and the 1 cup millet to a boil. Cover, reduce heat to medium-low, and cook 15 minutes, much like rice until liquid absorbs. Remove from heat and let sit covered with a towel for 3-5 more minutes. This will be approximately 2.5 Cups in volume when done.
Once the millet is cooked and cooled, the opportunities for use are almost endless…
This easy recipe is my very favorite millet recipes used as a side, as a quick lunch or rolled in Nori as veggie sushi:
Millet and Veggie Salad
Ingredients:
1.5 Cups Cooked Organic Millet
1/4 Cup Cubed Cucumbers
1/4 Cup Diced Onions (red, scallions or white)
1/4 Cup Frozen Peas/Carrots
3 TBS Low fat Italian Dressing
Optional:
1/4 Cup cooked Organic Black Beans (pictured above – making this a complete meal with protein)
1/2 an Avocado Cubed*
1/4 Cup Cubed Tomato**
Mix all together in a large bowl or a container that can be covered and refrigerated for several hours. Overnight is best.
Serve chilled.
Lasts for almost a week in the fridge.
*Avocados added separately before serving, due to oxidation.
**Add Tomato separately upon serving due to easily spoiled.
Thirteen (13) tips to save money in the kitchen.
By Donna Miller
In today’s economic climate so many people been impacted with a financial burden due to recession or job loss. We often hear the phrase: “I’d love to eat healthier, but I just don’t have the money.” There are so many areas in day to day life that require spending our hard earned cash that health and the family meal plan is put on the back burner because of finances.
But there are many areas in life that are within our control. Often curbing our over expenditures has to do more with unlearning certain spending habits and making a few lifestyle changes to get some areas under better control.
So where can you save money? There are many, but for the sake of focus let’s just look at one place – saving money in the kitchen.
Kitchen consumable goods and food are one of the most controllable expenses that we face each day, week, month and year. Here are just thirteen of my tips for making the most of these consumable items and food.
Non-food Kitchen Savings:
- Wash freezer baggies and aluminum foil to reuse.
- Use old credit cards as a kitchen scraper for dishes and counters.
- Trap fruit-flies for free without any chemicals using old fruit and a produce baggie.
- Use citrus mesh bags as a scrubby for pots and pans.
- Use citrus mesh bags to make your own sprouting lids.
- Reuse the wax paper that comes in the cereal box.
- Save butter wrappers to treat pans and cookie sheets instead of buying sprays.
- Use elastic to hold your pot/pan lids on the door rather than buying an ‘organizer’.
- Put all slivers of soap in a tied off toe of an old panty-hose (also a bathroom savings).
Food Savings Ideas:
- Buy and learn to use whole foods rather than pre-made mixes.
- Multiple uses for rolled oats and popping corn. One low price makes many options.
- Disguise and remix left-overs.
- Count how many items are in the pre-bagged produce items.
There are so very many more things that can be done in the kitchen to save money. The opportunities are endless. Look for future articles to come with even more ideas and tips to try in your own home.
By putting each of this baker’s dozen of tips into practice, the savings mount up and so does your expendable income. As you learn to stretch what you have, you are also gaining a very vital skill. Enjoy the journey!
For more detailed information on how to do these tips with examples and ideas – listen to this episode of ‘Surviving on Shoestrings’
For videos of some of these ways and more to stretch what you have in the kitchen and save money stop by the Millers Grain House Video Archive.
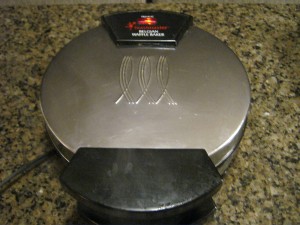
Gluten free does not mean you have to live on only processed (expensive) foods. In fact, if you are eating gluten free you can still get whole grains into your diet. It’s not only wheat that has bran to help with digestion and colon health but all other forms of whole grains such as oat groats, rice and quinoa seeds such as amaranth and legumes like pintos and navy beans all are rich in fiber (and more). So opting to go gluten free doesn’t mean buying only pre-made mixes and boxed pre-made, processed food items. Here’s a recipe for some GREAT gluten free waffles that you can make in a flash by using only whole grains.
One of the things that started my choice to mill grains at home actually was a gluten sensitivity diagnosis. At that time, the gluten free options were few and far between as well as extremely expensive. When we started milling our own grain at home, we realized not only how much healthier it was but how much more versatile and economical it was as well. We completely stopped buying expensive convenience foods and began making larger batches of our favorite whole grain foods to have conveniently ready at home.
Not only does this recipe (once doubled) lend itself to making more and freezing the left-over waffles for a quick toaster breakfast – it has been adapted to be gluten free and is super easy to make the very first time as well! The tip is about 5 minutes of prep the night before…leaving very little prep time in the morning!
You can choose to either mill these grains all together in your Wondermill or Wondermill Jr. Deluxe or do a combination of some milled gluten-free flour and some whole grains. No matter the combination of grains that are left whole and soaked or milled into flour, you will still be using unprocessed whole grains either way.
Easy, Multi-Grain Gluten Free Blender Waffles
Makes about 8 – 8″ Belgium Waffles
Over Night Ingredients:
- 1/2 C Teff Grains (whole or mill that 1/2 Cup)
- 1/2 C Brown or Sweet Rice (whole or mill that 1/2 Cup)
- 1/2 C Rolled Oats (or mill 1/2 C of oat groats – but don’t mill the rolled oats)
- 1/4 C Whole (or milled) Millet
- 1/4 C Whole (or milled) Quinoa
- 1/4 C Corn Meal (mill popping corn or dry corn or use left-over [wet or dry] grits)
- 2 C Non-fat Buttermilk
- 1/3 C Canola, Coconut or Grapeseed Oil
- 2 TBS Organic Sugar
- 2 Eggs
- 1 TBS Vanilla Extract
- 1/2 tsp Sea Salt
Put all the above ingredients in a blender or VitaMix and take for a short spin before putting in the refrigerator over night.
Add Morning Ingredients:
- 1 tsp Baking Soda
- 2 tsp Baking Powder
The next morning, simply wake up, pour your coffee and enjoy the fact there there is no rush!!
When you’re ready, heat the waffle iron and pull the blender from the fridge. Then, while the mixture is running, add the above two ingredients and run until batter is smooth. You may want to adjust the consistency a bit by either adding more buttermilk or more milled gluten free flour. It should be a little thinner than a pancake batter.
Once your waffle iron is heated, thanks to the handy dandy pouring feature of the blender, just pour on to the iron until about 1/2 full…close the lid and proceed as normal until you’ve produced a fluffy yet crispy.
Keep these warm for a crowd in a 200 degree oven – right on the rack. Serve warm and enjoy. But be prepared. You’ll want to make more!
If you’re cooking these for future quick breakfasts on the go. Put all extra waffles on a wire rack to cool. Not on a solid surface (they sweat and get soggy).
Once the extra waffles are cooled, you can store them in a freezer bag with wax paper between them and take them out like a cheaper, healthier, gluten-free ‘eggo’. They work great in the toaster or toaster oven, un-thawed straight from the freezer!
EnJOY!!
________________________________________________
 Donna Miller is a teacher, author, sought-after speaker and trainer. She has been a both guest and host on internet and broadcast radio talk-shows and in television interviews.
She is the hostess of “Your Preparation Station” on Preparedness Radio Network. and Surviving on Shoestrings. She and her husband are the Organizers of WNC Preparedness Group in Asheville, NC. She is an Adjunct Instructor for Frontier Christian University. She teaches local classes & ladies retreats for people to learn hands skills.
She and her husband are the founders of Millers Grain House and Your Preparation Station and are on the board of PREPARE Magazine.
Joseph and Donna have been happily married for 28 years and have three adult children, and one daughter in-law.
________________________________________________
You know, I wish everyone who read this blog post lived closer. Mostly because my most favorite thing about my ‘work’ is teaching. I really am not a fan of inanimate objects, retail sales or general accumulation of stuff…but I am a fan of acquiring skills and then sharing them with others. If I could make a living off of just sharing what I’ve learned through trial and error…I most certainly would!
So why am I blogging about a class that you may or may not be close enough to come take…well… because we hope to create this class as a downloadable video or a DVD. Well, and yes, if you are close enough to the neighborhood – I’d love to meet you and share this experience with you (provided your interested of course).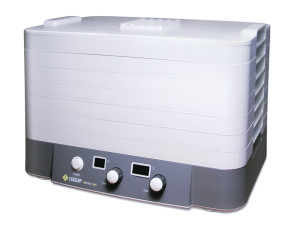
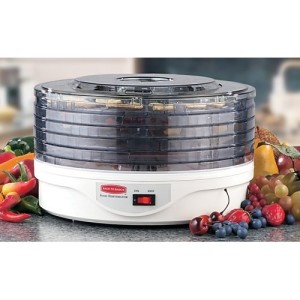

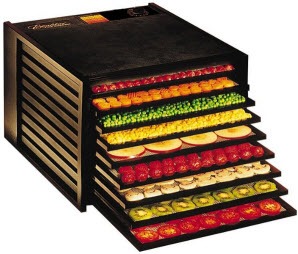 Dehydrating is one of the best ways to prolong the harvest and halt the spoiling of fresh produce (thus saving money). As a matter of fact today – just before posting this – we were dehydrating some mushrooms in the All American Sun Oven just outside the shop door. Why? Because they were on sale because they were too close to the ‘buy by’ date and we know we can make them long-term shelf worthy this way BEFORE they spoil!
Dehydrating requires no electricity for storage so when the power goes out, you still have shelf stable food available without all the added preservatives.
So if you are able…I hope you’ll consider attending this (or any other class)!
The Dehydrating Basics Class will give you the basics of getting started. We’ll share some ideas of what dehydrates well, what doesn’t and even some surprises with things you thought maybe couldn’t BE dehydrated but can be!
Here’s what we’ll do….
Eat some samples and give you some recipes. (:
Learn Proper Storage instructions for your dehydrated foods.
Learn some Re-hydration tips.
Demo and try a couple of Non-Electric options to dehydrating.
If you own a dehydrator already – this is a chance to learn to take full advantage of this money saving tool! I hope you’ll attend if you can, or if not, perhaps we can send you the DVD later on!
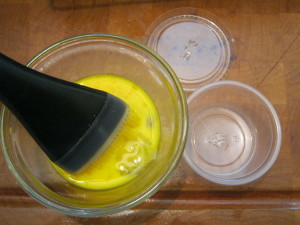
Often a recipe calls for an egg wash of either the entire egg or the yolk to be beaten with a little dab of water and then brushed on top of the item to either enhance it’s browning, create a glossy coat or adhere some tasty toppings or all three! But it’s inevitable…rarely is ”wash’ used in its entirety.
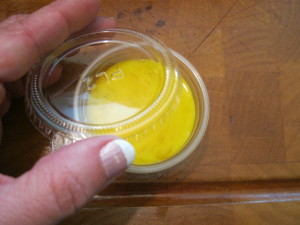
The easiest fix I’ve found for this is to break out the trusty tiny containers, known as souffle cups, that hold salad dressing or condiments ‘to go’. They cost very little at a discount store and are found on the same isle as zipper baggies and such. Something between 50 to 100 of them come in a small bag with the lids.
They work great for portioning out other things as well. If you’ve not seen the video on portion saving things such as salsa – go here and you’ll see why I like these little babies. But I digress…
If you only had to use the yolk for the wash, put the egg white in the souffle cup and beat the yolk and water as usual. Any surplus yolk wash can then be poured into the container with the white. If your recipe calls for the whole egg, simply pour the extra egg wash into the souffle cup and cover.
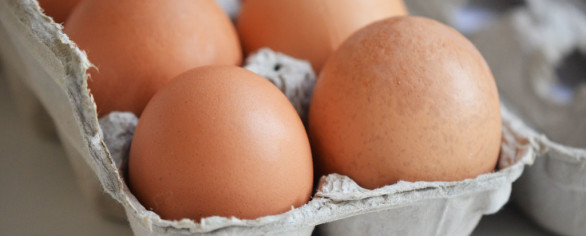
To be sure these get used… simply put the filled ‘scrambled egg’ back into the egg carton. It’s easily seen then to be added to a morning omelet or the next meal calling for scrambled eggs.
The only thing I would say is if the wash went on a raw meat for any reason…don’t save it…time to give the pets a treat (:

