Between the cost of a chain coffee shop frappe, the crud that is allowed to be put in one at any and all coffee shops, and the calories (a small size frappe has a range of 450-700 calories) found with a fast food frappe – it’s no surprise that the Food Holiday of “National Frappe Day” (Oct 7) may just pass you by. Then again, for 4 out of 5 people a frappe is almost an addictive indulgence and October 7 is just like every other day of the year!
If you enjoy these, let me share some things with you to save both your money and your health on this holiday or any day of the year that the frappe craving may hit.
 On average most commercial frappe’s you purchase will contain one or more of the following very unhealthy ingredients:
Uhm… ewww.
Here’s how you can avoid all of the above chemicals and artificial ingredients and enjoy a Frappe the Healthy Way! By the way – on a side note: Don’t be duped into thinking that those ‘coffee syrups’ are a singular or healthy ingredient option. They are neither.
First – select your coffee. This is very easy if you’re a morning coffee drinker (decaf or fully leaded – both work fine) simply make a few cups more and let it cool. When cooled you can either freeze in ice cubes (for a frozen frappe) or pour in a jar and refrigerate (for a frappe on ice).
Frappe on Ice:
8 oz of Cold Coffee 3TBS Fat Free Cream or Skim Milk (Almond or Coconut Milk works too) 1 tsp Pure Extract (Vanilla, Hazelnut, Peppermint, etc – endless options!) 1-2 dashes* of Spice (Pumpkin Pie, Nutmeg, Cinnamon, etc – endless options!) * For a Mocha use 2tsp of Cocoa Powder as the spice. Sweeten to taste with stevia or natural cane sugar Blend all ingredients together until well mixed and pour over ice cubes. Top with REAL Whipped Cream if desired add a straw and sit back and enjoy!Frozen Frappe:
2 Cups of Frozen Coffee Cubes 3TBS Fat Free Cream or Skim Milk (Almond or Coconut Milk works too) 1 tsp Pure Extract (Vanilla, Hazelnut, Peppermint, etc – endless options!) 1-2 dashes* of Spice (Pumpkin Pie, Nutmeg, Cinnamon, etc – endless options!) * For a Mocha use 2tsp of Cocoa Powder as the spice. Sweeten to taste with stevia or natural cane sugar Blend all ingredients together in a blender (may need to add 2-3 TBS of water to thin) until a frosty mixture is combined to the right consistency. Pour in a tall glass. Top with REAL Whipped Cream if desired add a straw and sit back and enjoy!
These may seem simplistic – but the pay out of enjoying real food at a real reasonable price can help you enjoy a little indulgence without feeling the guilt of it all later! After all, playing with your food helps you to enJOY the journey!
Happy National Frappe (the Healthy Way) Day! Best Blessings, Donna Miller of Millers Grain House
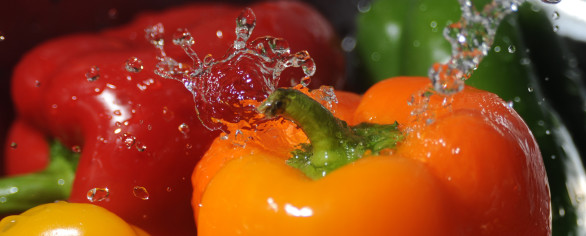
Maybe it’s not quite time for those special summer treats to come out of the garden, but it’s never too soon to practice how to prolong the harvest! But bell peppers (red, yellow, orange or green) are so expensive out of season! And what if a recipe only calls for a portion of a bell pepper? Then what do you do? Throw the rest away? No. But freezing them turns them to mush (and sometimes can make the freezer smell a little peppered). The answer is to dehydrate them. It is so easy and takes almost no time at all.
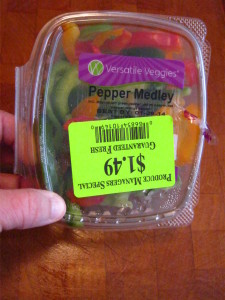 Although I like bell peppers just fine , they can become overpowering, so even when they are in season, I tend to use only about 1/4-1/2 of what ‘s called for in a recipe. Leaving me again with a surplus of these easy to grow summer veggies.
But out-of-season produce is always far too rich for my blood. So….
Enter my ‘out-of-season-go-to plan’ for most produce. When produce is in the grocer and it is not the season for harvest in your area, it’s getting trucked in and was picked “a long time ago, in a galaxy far far away”. This is one of the reasons you pay a premium price on produce out of season. But if you look for the pre-cut items that are marked down from their usually higher price tag (this one pictured usually runs $3.48 for the half pint) you can save a step and a buck or two at the same time.
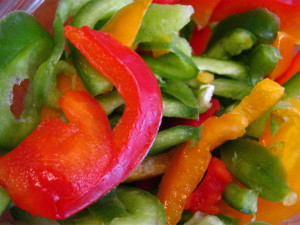 I bring them home and rinse and check them in a colander. They are, after all marked down, I want to be sure that there’s nothing funky hiding in the midst.
Since these are already sliced, like most packaged produce, in uniform widths, they are primed and ready to dehydrate with ease.
I let them drain for just a few minutes while pulling out my Excalibur 9 Tray Economy Dehydrator. I have to admit – that this one appliance has not only paid for itself by putting back items from the garden, but has helped me by prolonging the life of produce that was on sale and keep from throwing out food that has been in the refrigerator a while. 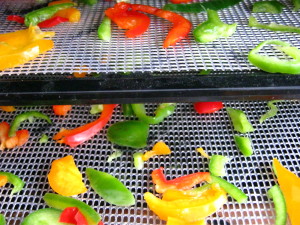
Bounce of any clinging water from the colander and pour out on to the dehydrator tray. There may be a need for multiple trays depending upon how big of a stash you were able to snag at the grocer when they were marked down. Just spread these beauties out equally and give them some breathing room!
Now, if you want them to remain a LIVE food…dehydrate them below 115 degrees F. The enzymes will stay live (not the bacteria but the enzymes that help with digestion) and just keep drying until desired dryness is achieved. This may take up to 24hrs.
However, if you’re going to put these into recipes later, or chop up little bits for meatloaf or sauces…crank them on up to 130 and you’ll be done faster! Likely you’ll have dry peppers ready for storage wtihin 8 hours. So it’s an ideal over night project.
Remember the Excalibur 9 Tray Economy Dehydrator costs about 1 penny per hour (often less) of electricity to use. So either choice you make for drying purposes does not really cost you that much more to prolong the produce you dry.
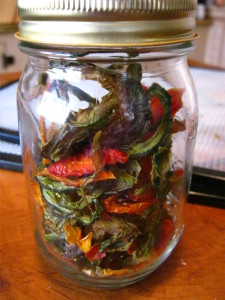
As soon as they are dry to your liking (hint: they dryer they feel the longer they will last) let them cool to room temperature and place in a jar or other air tight container. They must be cooled to avoid sweating, but also cannot be left out too long to pick up any moisture from the air. Inside the container place a desiccant packet. Especially if you’re going to use these over the next few months, the desiccant packet will be fine enough. There is no need for an oxygen absorber unless you plan to ignore this food indefinitely. If you have a food-saver you can remove air with the jar sealer attachment to remove more air in between the times you open and close the jar to use your pretty little peppers (or whatever produce you’ve dehydrated). The desiccant packet removes any moisture thus keeping the food dryer longer. Just be SURE when you purchase or use desiccant packets that they are marked clearly for Food Grade Use like the ones we have selected as examples below.
I hope that you’ll use some of these tips on more than just the bell pepper and try to prolong produce of many kinds. Until next time, keep playing with your food and enJOY the journey!
Best Blessings, Donna
In full disclosure, yes we do make our living from the sale of items (which we also use personally and can in good faith recommend) such as these desiccant packets and the Excalibur Dehydrator. If you like what we share with you, please consider purchasing your needs with us at Millers Grain House. We promise to treat you like family. (:
Oat groats are such extremely versatile little grains!
They can be milled by a grain mill (when still a whole grain) in to oat flour. Although not ideal for making use of in yeast breads as the single flour, the flour can be included as part of the required flour, yet oat flour can be utilized practically entirely as a substitute in various other baked goods not requiring yeast.
Oat Groats can likewise be utilized as Steel Cut Cereal (see picture at the right) and prepared as a thicker, chewier variation of oatmeal, included in a selection of warm dishes and baked/cooked goods.
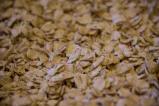
They can be rolled with a flaker turned into the old made rolled oats that the majority of individuals know them by. (pictured to the left)
Once rolled, they can then be chopped into finer pieces using the food processor utilizing the S-blade and turned into healthy Quick Oats! See this video – http://www.youtube.com/thewheatguy#p/u/31/CR6En56LNUU
From one extremely versatile grain, you could make so very many different food staples. Such a great space saver for long term food storage space and a healthy and balanced option to fast fix foods with that contain harmful additives.
For more tips to how much variety this one grain (oats) can give you – you may enjoy this short radio show “Getting Grain Specific: Sewing some (wild) oats” – Just fast forward to about minute 10:00 because there were terrible technical difficulties… but there is still some good info! (: *embarrassed smile*
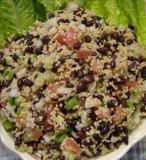
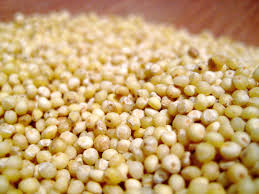 This Gluten Free: Easy Millet & Veggie Salad is a great summer treat.
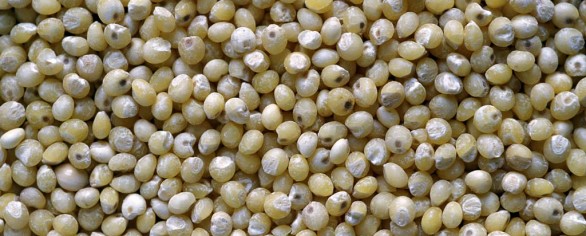
Commonly used in gluten free diets, I’ve found this grain is even more versatile when used whole rather than milled into flour. I like the simplicity of it and the texture. It rivals the texture of couscous (which is not a grain at all but a small durum wheat pasta) holding it’s form and shape well even after over cooking. It is an excellent option to replace rice and other whole grain side dishes.
For those warm summer nights and easy summer lunches, this recipe is both filling and cool to keep the kitchen from becoming a hot spot.
First be sure you are using food grade millet. Be sure it is fit for human consumption and not bird seed.
To cook basic, plain millet:
Rinse and drain 1 cup of millet. Set aside. In a medium saucepan, bring 2 1/2 cups water and the 1 cup millet to a boil. Cover, reduce heat to medium-low, and cook 15 minutes, much like rice until liquid absorbs. Remove from heat and let sit covered with a towel for 3-5 more minutes. This will be approximately 2.5 Cups in volume when done.
Once the millet is cooked and cooled, the opportunities for use are almost endless…
This easy recipe is my very favorite millet recipes used as a side, as a quick lunch or rolled in Nori as veggie sushi:
Millet and Veggie Salad
Ingredients:
1.5 Cups Cooked Organic Millet
1/4 Cup Cubed Cucumbers
1/4 Cup Diced Onions (red, scallions or white)
1/4 Cup Frozen Peas/Carrots
3 TBS Low fat Italian Dressing
Optional:
1/4 Cup cooked Organic Black Beans (pictured above – making this a complete meal with protein)
1/2 an Avocado Cubed*
1/4 Cup Cubed Tomato**
Mix all together in a large bowl or a container that can be covered and refrigerated for several hours. Overnight is best.
Serve chilled.
Lasts for almost a week in the fridge.
*Avocados added separately before serving, due to oxidation.
**Add Tomato separately upon serving due to easily spoiled.
You know that phrase made famous by the Vikings in the Capital One commercial? “What’s in Your Wallet?” – Well, let me ask: “What’s in YOUR Fridge?”
On any given day that may be a scary question for some – but for most of us after  Thanksgiving, it’s not only scary, it’s a downright daunting and overwhelming question!
The answer is a resounding LEFT OVERS!
When faced with a myriad of foods that you don’t normally eat during the year, left in odd amounts hiding or sliding around after Thanksgiving, some of us may be tempted to toss the left over food, given the turkey coma we have just induced. But do not despair… There are many things you can do with left over Thanksgiving goodies so you won’t waste your food budget by feeding it all to the dog.
Mashed Potatoes:
Portion them out into one cup servings, into baggies and freeze. When you need to thicken a soup, top a pot pie or simply have a quick side dish (seasoned with cheese, chives, garlic, etc) – these are quickly thawed and used.
Sweet Potato Casserole:
Portion this out into one half cup servings, into baggies and freeze. These make great additions for muffins and can be added in to winter squash soups. Again they are a stand alone side dish at a far later date.
Green Bean Casserole:
Given that this is usually laden with mushroom soup and fried onions – it usually doesn’t keep well for too long. Plan on tossing this into your turkey pot pie as an added green veggie and cream soup base. The onions will soften and blend with the other ingredients…no one will know that you used it there.
Cranberry Relish/Jelly:
Also another great add-in for muffins. It turns your muffins a sweet pink and you don’t have to add as much sugar as the usual recipe.
Turkey:
I’m not sure why we always have way more turkey than I think we will. After days of turkey sandwiches – it’s still HERE! So here are some thoughts…
Break the bones with the meat on them, boil and make broth that can be frozen or canned.
Then de-bone all the meat you can glean (we ended up with a gallon bag of bits) and make any number of things such as turkey and rice soup, turkey pot pie, turkey salad for wraps or sandwiches, turkey tacos (use taco seasonings), turkey barbeque on a whole wheat bun. Yes, all of these are on the menu for the next few weeks at our home. Simply label and freeze portion sizes to make the specific meal.
Once you’ve tended to the left overs and they are in their proper place (not hiding in the fridge or trashed) you can move on to some more ‘normal’ meals and enjoy the fact that you can give Thanks for having this other food on hand!
 Donna Miller is a teacher, author, sought-after speaker and trainer. She has been a both guest and host on internet and broadcast radio talk-shows and in television interviews. She enjoys teaching online and local classes & ladies retreats for people to learn whole food cooking, budget friendly techniques and preparedness skills. Donna is happily married and has three adult children, and a daughter in-law. She and her husband (Joseph) are the founders of both Millers Grain House , Your Preparation Station and are on the board of PREPARE Magazine.
|
 Typically a cold weather food, Split Pea Soup is a hearty meal that can be made entirely from foods that are stored for long term. Split peas last for a year or more in the pantry. Dehydrated carrots, onions and spices are also long term food storage items. If you can your own veggie or chicken broth, or purchase granules or bullion cubes then you’re set. Nothing has to be “in season” to make this filling soup.
Here is the recipe and the steps.
Ingredients:
- 1/2 Cup shredded or diced dehydrated Carrots
- 1/4 Cup diced dehydrated Celery
- 1/4 Cup diced dehydrated Onions
- 1/2 Cup dehydrated Potato Cubes(optional)
- 2 Cups Split Green Peas
- 1 TBS Olive Oil
- 1 TBS Garlic Salt
- 1/8-1/4 tsp Cayenne
- 1/4 tsp Cumin
- 2 Quarts of Soup Stock (veggie or chicken or water/bullion equivalent)
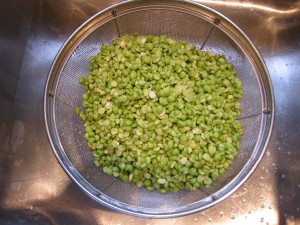
First – soak 2 Cups of Organic Split Green Peas over night
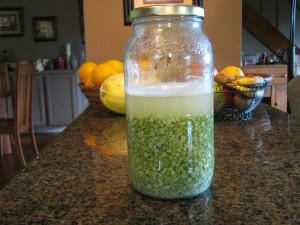 Don’t worry. They will likely look a little ‘frothy’ in the morning, but this is normal.
Just be sure before you go to sleep that you have covered the Split Peas with more than double their height in water. For example, if the peas are about 4 inches in depth, put 8 inches of water ABOVE THE TOP. Twelve inches all together. Because the peas will soak up a LOT of liquid over night making them easier to cook to smooth the next day.
After soaked, drain them before moving on with the rest of the recipe.
Mean while, back at the soup pot: Add about 1 Cup of the liquid to the base of the soup pot, put in all of your dehydrated veggies and let soak for a little while (approx 30 minutes).
Now add remaining liquid/broth, Drained Split Peas and spices. Cook on low heat for 2-4 hours. Stirring occasionally.
Either use a stick blender and put in the pot whirring until creamy or transfer by one cup at a time to a blender to blend most of the soup to creamy. For a chunkier soup, blend only half of the soup and leave the rest as is. Combine. For a smoother soup, blend it all. Serve hot.
Serve with freshly baked bread for a real treat.
This can even be pre-made with the dry ingredients in a cute little gift jar. Simply put the Split peas as the base and a small decorative bag full of the other dehydrated foods combined with the herbs as a topper inside the jar.
EnJOY!
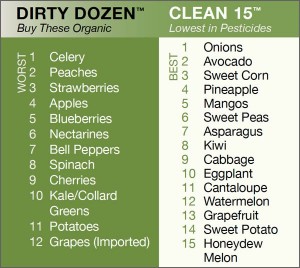 If there were one budget benefit to the rising food prices of our current economic climate, it would be that the prices of ‘regular’ produce have virtually met the price of organic produce. Now making the choice between the two options does not have the same wide cost comparison. Yet again, knowing just what to purchase as organic and what is lower in pesticides is always a good thing to keep in mind when trying to provide healthy foods on a budget.
There are lists like the one pictured here in this article that can be helpful in deciphering just what to spend your money on when planning your grocery budget. Organic Produce and Low Pesticide Produce are categorized into the ‘Dirty Dozen’ or the ‘Clean Fifteen’. The trick here is to remember them. I can barely remember to take the list of needed items and coupons, so this additional list will likely get left on the kitchen counter instead of in my hand at the grocery store. However, there are a few tips and tricks to help you remember what are the best choices:
- Print out and potentially laminate the list above and keep it in your wallet or check book. This way it is always with you, even when you happen upon a farmers market or fruit stand. I also do this with printer cartridge information for the copier.
- Forgot your list? No worries, just remember that most of the fruits and vegetable s that you also eat the skin or peel (or that the peal is fuzzy and absorbent) you will want to purchase as organic. Produce that you peel or remove the outer layer are often lower in pesticides both during the growing process and you habitually lower the intake by removing the outer layer before consuming.
- Most produce has 4 to 5 numbers on the sticker. Look at the first one to know what you are getting: Starts with a “9” – Organically Grown and non GMO. Starts with “3 or 4” – Conventionally grown, not genetically modified (non-GMO), but also not organic. Starts with an “8” – Genetically modified (DNA altered), so hate eight.
- Last but certainly not least, and definitely the most trustworthy and budget friendly approach….grow your own! Not only will it save money, you’ll have the satisfaction of knowing what went into the process, appreciate the end product and enjoy the taste far more!
Hopefully this will help as you approach your produce selection to feel you are confidently spending your hard earned budget money on food that best nourishes your family. Listen to the April 18, 2012 episode of “Encouragement in the Kitchen” for more insight and encouragement about this topic.
Have you ever faced the end of a holiday season and had an overflow of foods that are usually not eaten through out the year? We face this after almost each holiday and ti forces me to become creative to avoid wasting food.
Usually, I clean out the refrigerator a little each week, but after a holiday – this required some serious attention. Weekly refrigerator cleaning is key to stretching the grocery dollars.
Although usually my focus is on whole wheat , the truth is that although whole grains are a great base for a healthy and frugal grocery budget, they are not alone on the menu. Learning to make the most of each ingredient, fresh, frozen, or otherwise will help make the most of your groceries and help them to stretch giving you more life for your dollar.
We hope you enjoy the video and subscribe. There are more ideas to prolong the life of your food in the remainder of the series.

